This is your WordPress desktop!
The desktop is the first place you will come to every time you access your site.
This is where you will find all your WordPress tools.
If you need help, simply click on the "Help" tab above the screen title.
In this section we can find the following mergers:
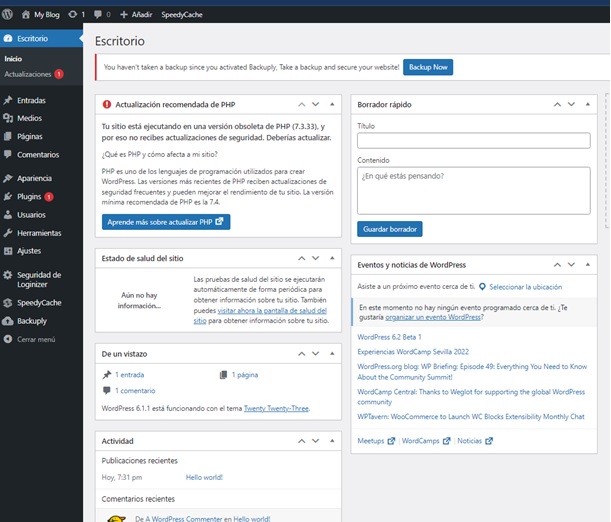
Upgrades: "If an update is available, a notification will appear in the toolbar and in the navigation menu. Keeping your site up to date is important for security. It also makes the Internet a safer place for you and your readers."
How to Upgrade:
WordPress - Updating your WordPress installation is a simple one-click procedure: just click the "Update Now" button when you are notified that a new version is available. In most cases, WordPress will perform security and maintenance updates on its own.
Themes and Plugins - To update themes or plugins one by one from this screen, use the checkboxes to make your choice, then click the corresponding "Update" button. To update all your themes or plugins at once, you can select the checkbox at the top of the section to choose them all before clicking the update button.
Translations - The files that translate WordPress into your language are updated when any other update occurs. But if these files are outdated, you can click the "Update translations" button.

Automatic updates: pueden ser activadas o desactivadas para las versiones mayores de WordPress y para cada tema o plugin individual. Los temas o plugins con las actualizaciones automáticas activadas mostrarán la fecha estimada de la siguiente actualización automática. Las actualizaciones automáticas dependen del sistema de programación de tareas WP-Cron.
Please note: Third-party themes and plugins or custom code may override WordPress programming.
Summary: This screen gives you access to all your entries. You can customize the format of this screen to suit your work system.
Screen Content: You can customize the format of the contents of this screen in many ways:
- You can hide/show columns based on your needs and decide how many entries will be displayed per screen using the "Screen Options" tab.
- You can filter the list of entries by publication status using the text links above the list of entries to show only entries in that status. The default display is to show all entries.
- You can view the entries in a simple list of titles or with the excerpt, using the display options tab.
- You can refine what is displayed in the entry list by having only entries from a specific category or month displayed using the drop-down menu above the entry list. Click on the Filter button after making your selection. You can also refine the listing by clicking on the author of an entry, category or tag in the entry listing.
Actions available: Hovering over the entry line will display the action links, allowing you to manage the entry. You can perform the following actions:
- Edit takes you to the edit screen for that entry. You can also get there by clicking on the title of the entry.
- Quick Edit provides online access to your entry metadata, allowing you to update entry details without leaving the screen.
- Garbage can removes your entry from this list and places it in the trash, where you can permanently delete it.
- Preview will show you what your draft will look like if you publish it. "View" will take you to your site to view the entry. The link displayed depends on the status of the entry.
Shares in Lot: You can also edit or move several entries at once to the trash. Select the entries you want to act on using the check boxes. Then select the action you want to perform from the "Batch actions" menu and click "Apply".
If you use batch editing you can change the metadata (categories, author, etc.) for all selected entries at once. To remove an entry from that grouping, just click on the x next to the name in the batch edit area that appears.